
Over the past few months I've been buying an awful lot of shirtdress patterns, so when McCall's put the word out they were doing a sewalong this spring, I was all in. I don't wear a lot of dresses in general, but shirtdresses are a different matter. I like their tailored look and they're an empty canvas to dress up or down. On top of this, I love sewing tailored shirts so it was the perfect project for me to fill in a hole in my wardrobe.
Here are the details:
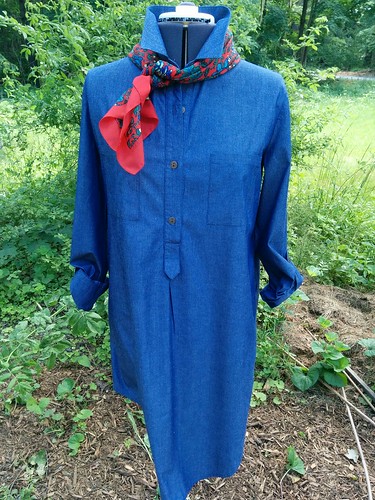
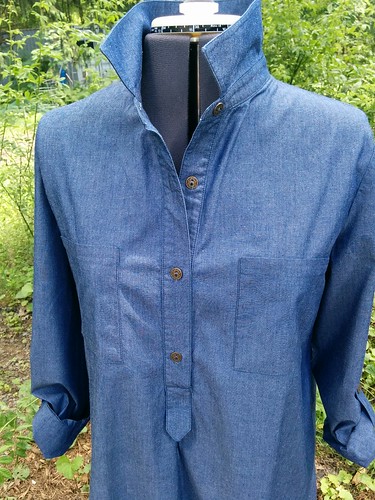
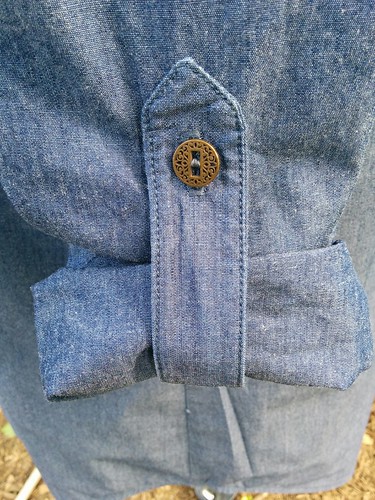
Pattern: McCall's M6885, a semi-fitted, pullover shirtdress with a pointed collar, collar/front bands, button-up placket, front pleat and narrow hem. I sewed view D with patch pockets, tie ends, long sleeves with button tab, and a shaped hemline.
Size: I cut a 14 at the bust and graded out to a 16 at the waist and hips.
Fabric: A blue chambray-like cotton fabric from my stash. It may be a blend of cotton and linen. Nice and lightweight, perfect for summer. Washes and presses beautifully. Where did I buy this? No idea, but my guess is That $1.99 Fabric Store in Auburn, MA. In the pictures above, the blue IRL is more of the darker blue than the lighter blue in some of the shots.
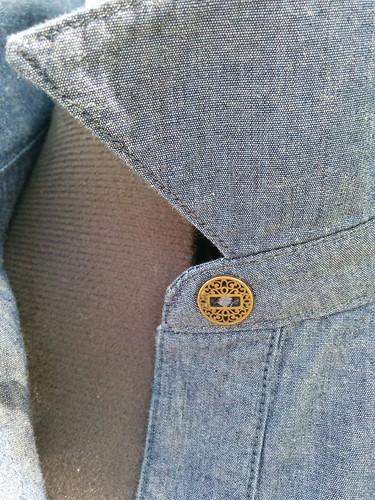
Notions: Gutermann thread, Pro-Weft Supreme Light fusible interfacing from Fashion Sewing Supply, metal buttons from Joann Fabrics.
Sewing Details: I created my own order of construction with this project. I wrote out every step and broke the project down over five days, starting with cutting out the pattern and washing my fabric and ending with sewing on the last button. I made a few changes to the suggested order of construction that the pattern sheet provided; for instance, I worked on all the smallest pieces first, like the sleeve tabs, pockets, and collars. Having my own order of construction really helped keep me focused and kept me from making dumb mistakes because when I was done with that day's tasks, I was DONE. No late night sewing mishaps for me!
The one thing that I didn't catch until the very end was how McCall's wants you to sew the sleeve tab button until the very end of the project. It would have been easier to do this when the sleeve tab was being sewed on the flat sleeve, especially if you use a sewing machine to sew on buttons, as I do. Also sewing the buttonhole at the bottom of the front placket was difficult with all the fabric bunching up at the bottom. If I make this pattern a second time, I'll take my chances by sewing buttonholes on the placket earlier in the process.
Meg Carter at McCall's had a great tutorial that helped me a lot with constructing the front placket.
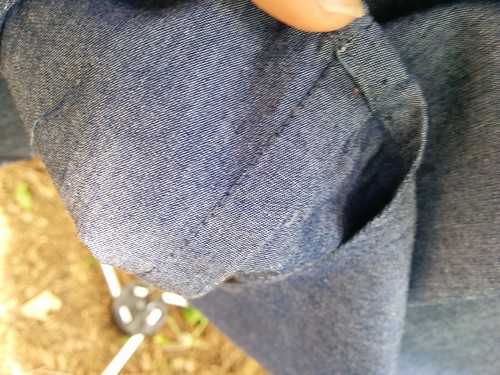
My goal was to create a garment with a very clean finish on the inside. Shoulder seams are French seamed, then topstitched from the outside ... I guess sort of mock felled seam? The seams down the side are also French seamed. For the armhole seams, I trimmed and overcast them with my sewing machine; I had already clipped into the seam allowance, making a felled seam a little more difficult, so I took a bit of a shortcut here. The dress was finished with a narrow hem.
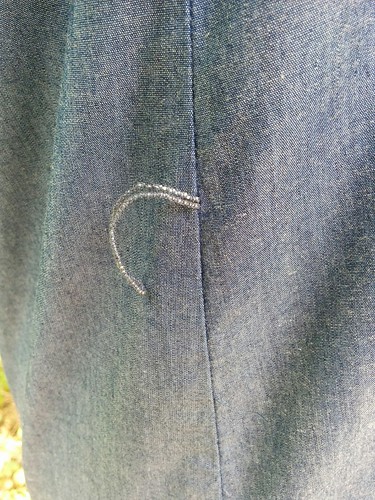
One major thing I changed was eliminating the side ties. I wanted to have the option of using my own belts, so instead I made thread chains by zig-zagging over pearl cotton from my embroidery box, then sewed the thread chains into the side seams. These loops will keep looser belts from falling down my waist. Over the next couple weeks I'm going to make a few fabric belts in different colors.
So, what about fit? The shoulder/bust fit was perfect. I wish it were a little looser around my bottom, but I am losing weight so by the time we leave for vacation in August, I think it'll fit perfectly down there. The problem is in the arms. I should have done a muslin because then I could have done a bicep adjustment; the fit is just a little too slim-fitting for my tastes. Lesson learned. I think I would also like the dress about 2" longer as the side reveals a bit more leg than I'm used to.
Another lesson learned: do not assume white tailors chalk disappears. It didn't on this dress. I had used wax-based chalk to mark the wrong side of the fabric and was horrified when, after sewing on the pockets, I noticed a big greasy looking "x" on each of them. I was able to get most of stain out with Dawn Dish Liquid and a toothbrush, but I can still see a faint "x" on both of them. I guess no one will notice except me, or anyone who finds my boobs especially noteworthy.
At any rate, it was a satisfying project and I know I'll get lots of wear out of it later this summer during our trip to Europe. :)
Wow - that is beautifully made. Gorgeous. I bought myself (note "bought") a shirt dress last summer and although I love wearing it, it looks bloody awful. It's not very tailored and I have relatively thin legs so it makes me look, well......just not a good look.
ReplyDeleteI am however, in the middle of sewing Star Wars fabric shorts for my son. ;-)
Thank you, Toni. Shirtdresses, while comfortable, are not the most universally flattering types of dresses. It's not the best look on me, either, but it constitutes a dress, so there you go. The Star Wars shorts sound awesome! I hope you'll post a picture of them. I wish my son would still let me sew for him.
ReplyDeleteI love your shirt dress! And the fabric choice was a good one. It should look great with either leggings or jeans. It isn't a shirt dress, but have you seen the Archer pattern? It's on my "to sew for the fall" list, and has lots of variations. Thanks for the warning about the tailor's chalk.
ReplyDeleteKristie, I hope you will love the Archer pattern as much as I do. Grainline has a wonderful tutorial on their site that really helped me. I am so impressed with the jeans you made a few weeks back. They looked soooo professional. :)
ReplyDelete