Friday, June 24, 2016

Adventures in Hemstitching

Like a lot of people around the world, I woke up this morning and was pretty surprised to see that citizens of the UK voted to leave the EU. All I can say is that the people have spoken and I hope this ends up turning out well for all.

On to less political/hot topics ... hemstitching! A few years ago, I purchased Fine Machine Sewing by Carol Ahles at a local sewing shop. To be honest, I bought it because of the pictures, not because I had a burning interest in heirloom sewing, which I associate with christening outfits and dresses for young girls.

But lately I've been thinking about how to give my sewing projects a little more oomph. I briefly investigated an embroidery machine, but I think if I were to embroider it would be in small doses i.e. by hand and very discreet. Plus, it's another machine that requires specialty threads and stabilizers, meaning a whole new line item of cost.

I started researching embellishment techniques I could do by hand or with one of my sewing machines, everything from smocking to sashiko. And then I remembered Ahles book in my sewing library...et voila!

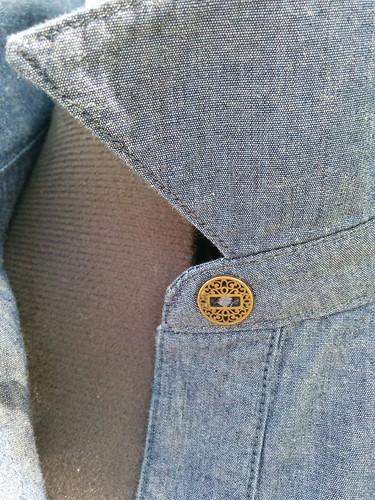
As I reintroduced myself to the text and pictures, I noticed many of the photos were of store-bought plain linen blouses that had been embellished by the author. I enjoy making blouses, but did I want to practice machine hemstitching on something I'd spent hours creating, only to ruin it with a poorly executed pivot? After all, hemstitching creates holes in a garment, holes you cannot hide or fix. The holes are created with a specialty needle called a wing needle, which has "wings" on either side of the tip that push fibers to the side and create a very visible opening. I decided the best course of action was to do a bit of practice on some linen in my stash and then follow-up with some practice on a store-bought garment.

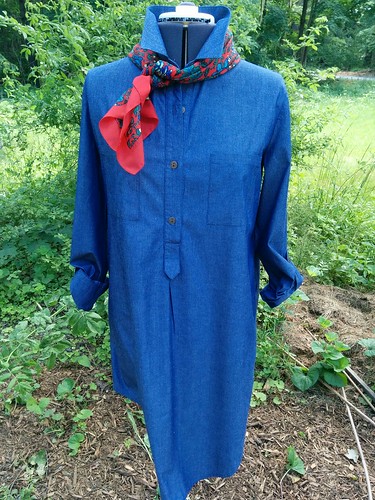
I scored this week at our (semi) local Savers: an ecru Liz Claiborne linen blouse, size medium.

2016-06-24_03-57-06

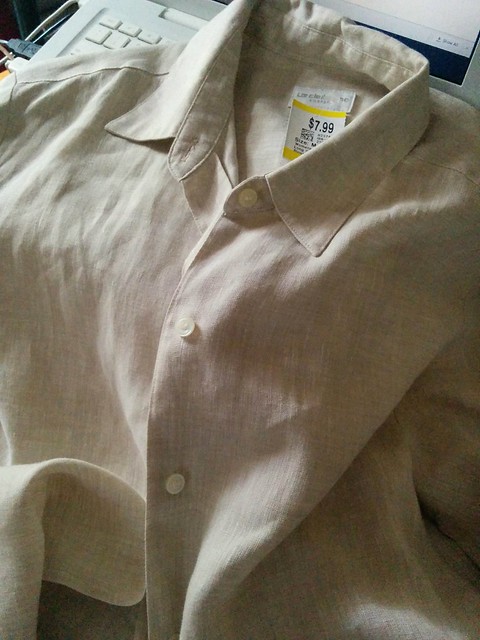
My original plan was to dye the blouse navy blue as there's a grease stain on the back shirt-tail and I thought the ecru color would wash me out, but I guess ecru is one of my "colors" -- it really flattered my complexion more than I thought it would. So plan B was to keep it undyed and remove the stain with my Dawn dish detergent and a sturdy brush, which never lets me down. If Dawn can take crude oil off sea birds,  it can handle oil on clothing, I say. The other benefit to plan B was that mistakes would be harder to see on an ecru blouse hemstitched with white thread than a navy blue blouse stitched in white.

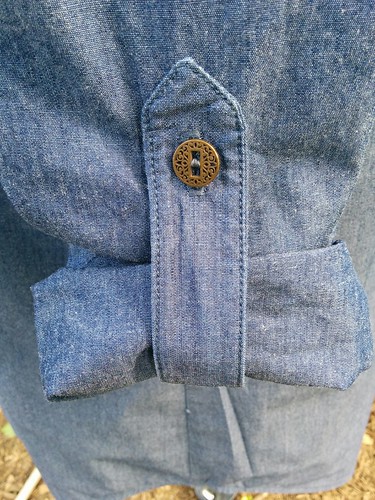
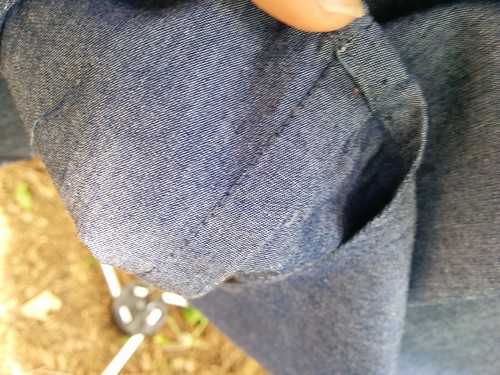
I decided to use a Parisian hemstitch, which is commonly used on linen napkins and table cloths, as well as clothing. It's elegant and subdued, and it was easier getting a good result pivoting around the very visible collar point. I did quite a bit of practice on scrap linen before I attempted the cuffs:

2016-06-24_03-55-40

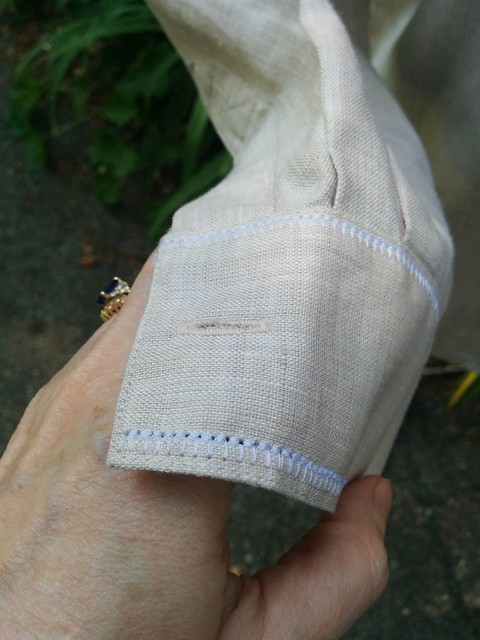
I would have liked to stitch around the whole cuff but I would have cut into the buttonholes. I noticed halfway through the first cuff that I'd inadvertently reset the stitch length and width I planned to use to the machine's preset stitch length/widths. Grr. But I was committed at this juncture, so I carried on.
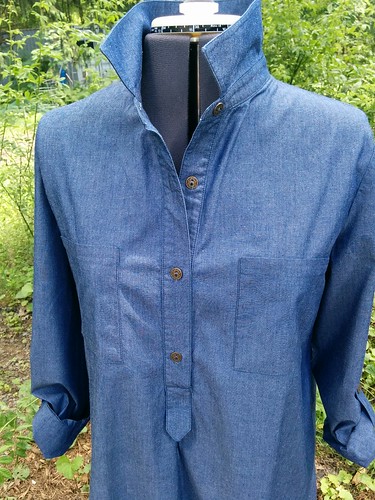
Next, the collar:

IMG_20160624_155246

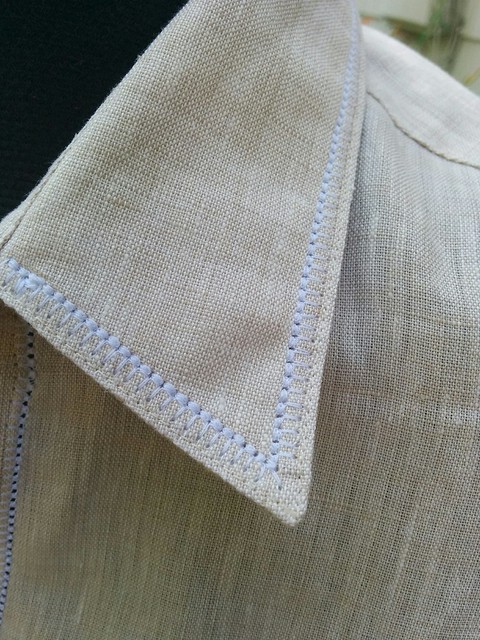
Here, I noticed that the holes were less pronounced and the thread was thicker on the inside row of stitching than they were on the cuffs. It was okay though; I liked the result and I managed to pivot around those collar points like a pro. ;-)

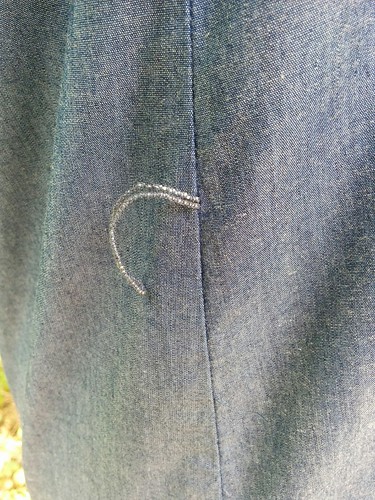
Emboldened by my success with the collar, I decided to add hemstitching down the sides of the front plackets:

IMG_20160624_155314

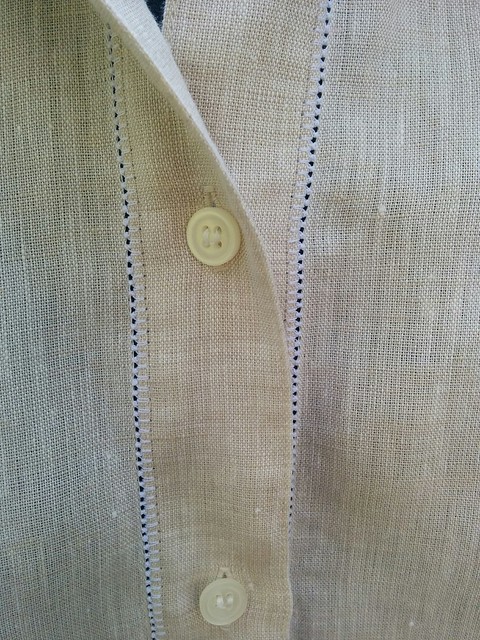
I was very happy with how this turned out. The holes were visible and the thread wasn't bunched up as much as it was on the collar and cuffs. It looked like true hemstitching.

Here's a picture of the "refashioned" blouse:

IMG_20160624_155230

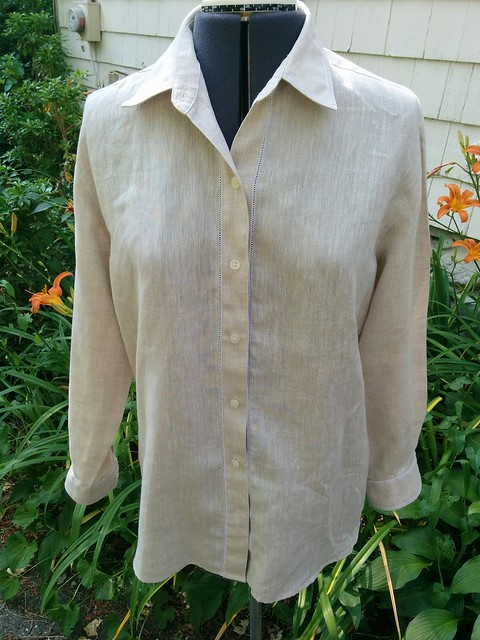
(You'll have to click on the photo to zoom it; the stitching isn't very visible at this resolution.)

I'm very happy with how this turned out. I don't think anyone will walk up to me and say, "Wow, what fantastic hemstitching! Where did you get that blouse?" but it really gives a very simple blouse a much more elegant look that *I* will appreciate.

My plan now is to continue sleuthing thrift shops for linen blouses that I can play with before I attempt sewing my dream blouse: white linen hemstitched in delft blue thread. I would also like a French blue blouse hemstitched in white ... and gray one, too.

I also scored in a different area at Saver's this week ... I found a copy of Connie Long's Easy Guide to Sewing Linings, which is out of print and can be expensive on Amazon. I got it for $2.99. :)

Tuesday, June 7, 2016

McCalls M6885 Shirtdress

McCalls M6885 Shirtdress

McCalls M6885 Shirtdress

McCalls M6885 Shirtdress

McCalls M6885 shirtdress

McCalls 6885 Shirtdress

M6885 McCalls Shirtdress

Over the past few months I've been buying an awful lot of shirtdress patterns, so when McCall's put the word out they were doing a sewalong this spring, I was all in. I don't wear a lot of dresses in general, but shirtdresses are a different matter. I like their tailored look and they're an empty canvas to dress up or down. On top of this, I love sewing tailored shirts so it was the perfect project for me to fill in a hole in my wardrobe.

Here are the details:

Pattern: McCall's M6885, a semi-fitted, pullover shirtdress with a pointed collar, collar/front bands, button-up placket, front pleat and narrow hem. I sewed view D with patch pockets, tie ends, long sleeves with button tab, and a shaped hemline.

Size: I cut a 14 at the bust and graded out to a 16 at the waist and hips.

Fabric: A blue chambray-like cotton fabric from my stash. It may be a blend of cotton and linen. Nice and lightweight, perfect for summer. Washes and presses beautifully. Where did I buy this? No idea, but my guess is That $1.99 Fabric Store in Auburn, MA. In the pictures above, the blue IRL is more of the darker blue than the lighter blue in some of the shots.

Notions: Gutermann thread, Pro-Weft Supreme Light fusible interfacing from Fashion Sewing Supply, metal buttons from Joann Fabrics.

Sewing Details: I created my own order of construction with this project. I wrote out every step and broke the project down over five days, starting with cutting out the pattern and washing my fabric and ending with sewing on the last button. I made a few changes to the suggested order of construction that the pattern sheet provided; for instance, I worked on all the smallest pieces first, like the sleeve tabs, pockets, and collars. Having my own order of construction really helped keep me focused and kept me from making dumb mistakes because when I was done with that day's tasks, I was DONE. No late night sewing mishaps for me!

The one thing that I didn't catch until the very end was how McCall's wants you to sew the sleeve tab button until the very end of the project. It would have been easier to do this when the sleeve tab was being sewed on the flat sleeve, especially if you use a sewing machine to sew on buttons, as I do. Also sewing the buttonhole at the bottom of the front placket was difficult with all the fabric bunching up at the bottom. If I make this pattern a second time, I'll take my chances by sewing buttonholes on the placket earlier in the process.

Meg Carter at McCall's had a great tutorial that helped me a lot with constructing the front placket.

My goal was to create a garment with a very clean finish on the inside. Shoulder seams are French seamed, then topstitched from the outside ... I guess sort of mock felled seam? The seams down the side are also French seamed. For the armhole seams, I trimmed and overcast them with my sewing machine; I had already clipped into the seam allowance, making a felled seam a little more difficult, so I took a bit of a shortcut here. The dress was finished with a narrow hem.

One major thing I changed was eliminating the side ties. I wanted to have the option of using my own belts, so instead I made thread chains by zig-zagging over pearl cotton from my embroidery box, then sewed the thread chains into the side seams. These loops will keep looser belts from falling down my waist. Over the next couple weeks I'm going to make a few fabric belts in different colors.

So, what about fit? The shoulder/bust fit was perfect. I wish it were a little looser around my bottom, but I am losing weight so by the time we leave for vacation in August, I think it'll fit perfectly down there. The problem is in the arms. I should have done a muslin because then I could have done a bicep adjustment; the fit is just a little too slim-fitting for my tastes. Lesson learned. I think I would also like the dress about 2" longer as the side reveals a bit more leg than I'm used to.

Another lesson learned: do not assume white tailors chalk disappears. It didn't on this dress. I had used wax-based chalk to mark the wrong side of the fabric and was horrified when, after sewing on the pockets, I noticed a big greasy looking "x" on each of them.  I was able to get most of stain out with Dawn Dish Liquid and a toothbrush, but I can still see a faint "x" on both of them. I guess no one will notice except me, or anyone who finds my boobs especially noteworthy.

At any rate, it was a satisfying project and I know I'll get lots of wear out of it later this summer during our trip to Europe. :)